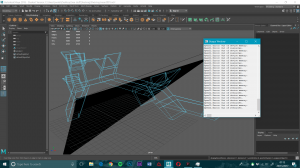
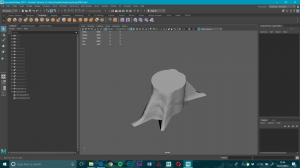
As I am learning more about the actual creation of assets, I’m learning more and more about where the type of things I want to create fit into the market. My original aim was to create assets for game engines, so they need to be low poly. In this journey, I have learned how to create high and low poly objects, and why low poly objects are used in gaming. As I started to search for my gap in the market, my subject became more of a photo-real, organic piece. I feel as though the style and look of assets I am creating would be more suited to 3D visualisations of properties and interiors, rather than gaming. I could create low poly versions of the models I am starting to create, but these would become more stylized, as my models have many curves to them, due to working with the natural shape of wood.
Game engines nowadays can handle tri-counts in the millions, so my assets could still be used in game engines, though I feel like my aims no longer fit this.
Below, is my original project proposal (in blue). This has now changed in many ways, which I will point out below (with green corrections).
Assets for portfolio project. The intended aim for this project is to produce three, high quality prop assets in various styles for my portfolio, which I will also consider putting back into the community with a sharing site such as Gumroad. After reading about how to enter the game environment industry, I have learned that this is something a portfolio should include.
My individual objectives are as follows:
– Learn how to use Zbrush or Maya (or both) after researching which software I need to learn.
– Design 3 assets in different styles. (After my initial ideas when looking at what was missing in available assets, I realised that it was better to create assets which follow a theme, in a similar style, but using different woods and materials in order to showcase different skills)
– Learn about creating assets with textures for game engines.
– Create 3 assets in one or both programmes.
– Texture 3 assets in Substance painter.
– Bake 3 assets down to a low poly mesh for gaming. (I have explored baking textures and have learned how to do this, but I don’t feel as though I need to display this with 3 assets. I have found that painting normal in Substance is sometimes more effective, and that I don’t always need to bake assets, though it is an option I now know how to use).
– Create the first half of a show reel, based on research of what other artists have done.
– Display the show reel on an Artstation page.
– Create a Sketchfab example of each for my Artstation page. (This will now be an Artstation page with my assets available to view in a 360 view via Sketchfab. I also plan to create stills of my models, either as screenshots from Sketchfab, into Photoshop, or as still renders in 3DS Max if possible.)
– To look into sharing my assets with the community as a possibility.
I have chosen the portfolio strand, as I feel this will allow me to research what I need to do, develop my 3 assets and textures, changing them along the way as I learn more, before presenting them as the asset part of my show reel. (Artstation page).
My idea is to create and texture 3 assets ready for a game environment, and to create the asset half of my show reel, as suggested by senior 3D/Environment artist, Robert Hodri in his article ‘Everything You Need to Know to Become a Game Environment Artist’ on Artstation. I will consider also allowing people to use my assets through a site such as Gumroad. (This has now changed to a more 3D interior visualisation aim, which will be more focused on ray trace rendering or game engines (but high-poly and with a final output as stills), this is something I will look into more for my second projects, but for now, my assets need to be realistic, and able to run on different platforms.)
My intended audience is employers in the Game Environment (3D visualisation, commercial) industry.
The final form of the output will be a short video breakdown of the 3 assets (both high and low poly), which will be half of my show reel. I plan to publish this on an Artstation profile I will create, as well as possibly sharing with the community. (The final output will be an Artstation page with my assets available to view in a 360 view via Sketchfab. I also plan to create stills of my models, either as screenshots from Sketchfab, into Photoshop, or as still renders in 3DS Max if possible. I will look into sharing my assets with the community).
This project will extend my creative and technical skills, by challenging me to draw and design my own assets, thinking about the styles I want to apply to each. It will teach me to sculpt my ideas, and texture them. It will expand my technical knowledge of the software used in the industry I aim to break into, as well as teaching me how to create assets for games versus the film industry.
I will now create assets, with more focus on the realistic graphics and less focus on making them as low poly as possible. I also plan to explore more textures with this.
