Coffee Table Reflections

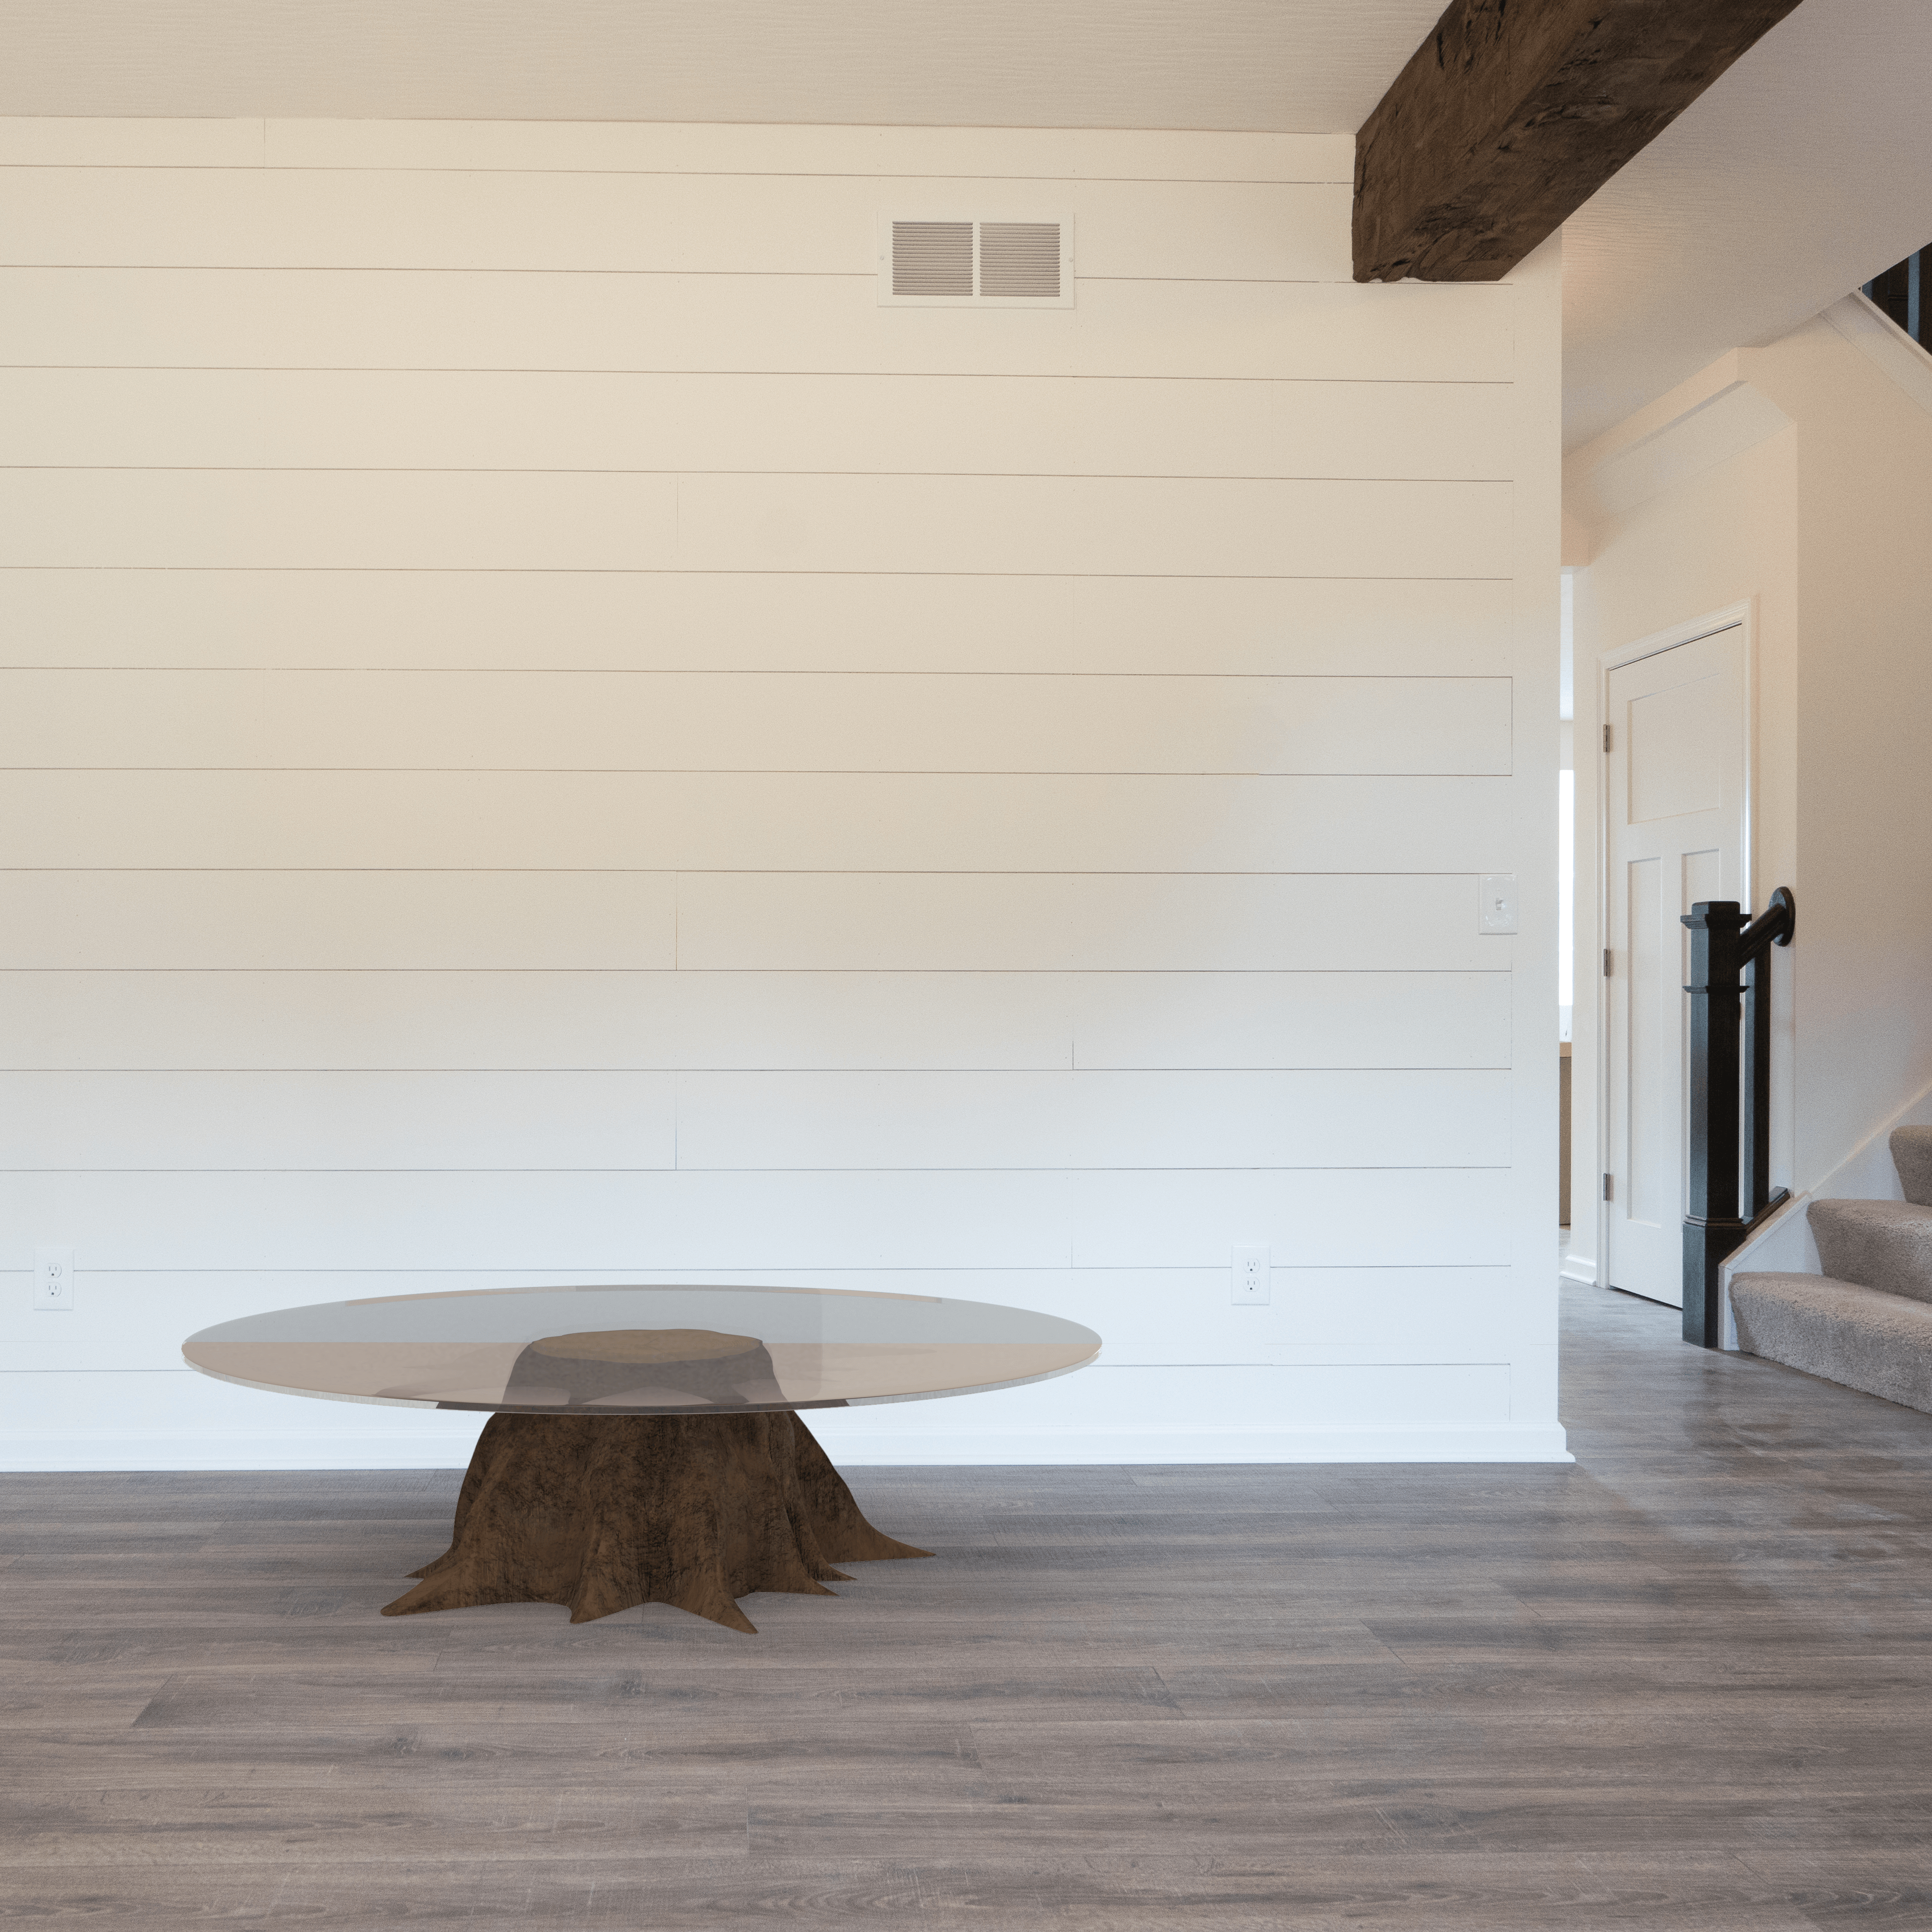
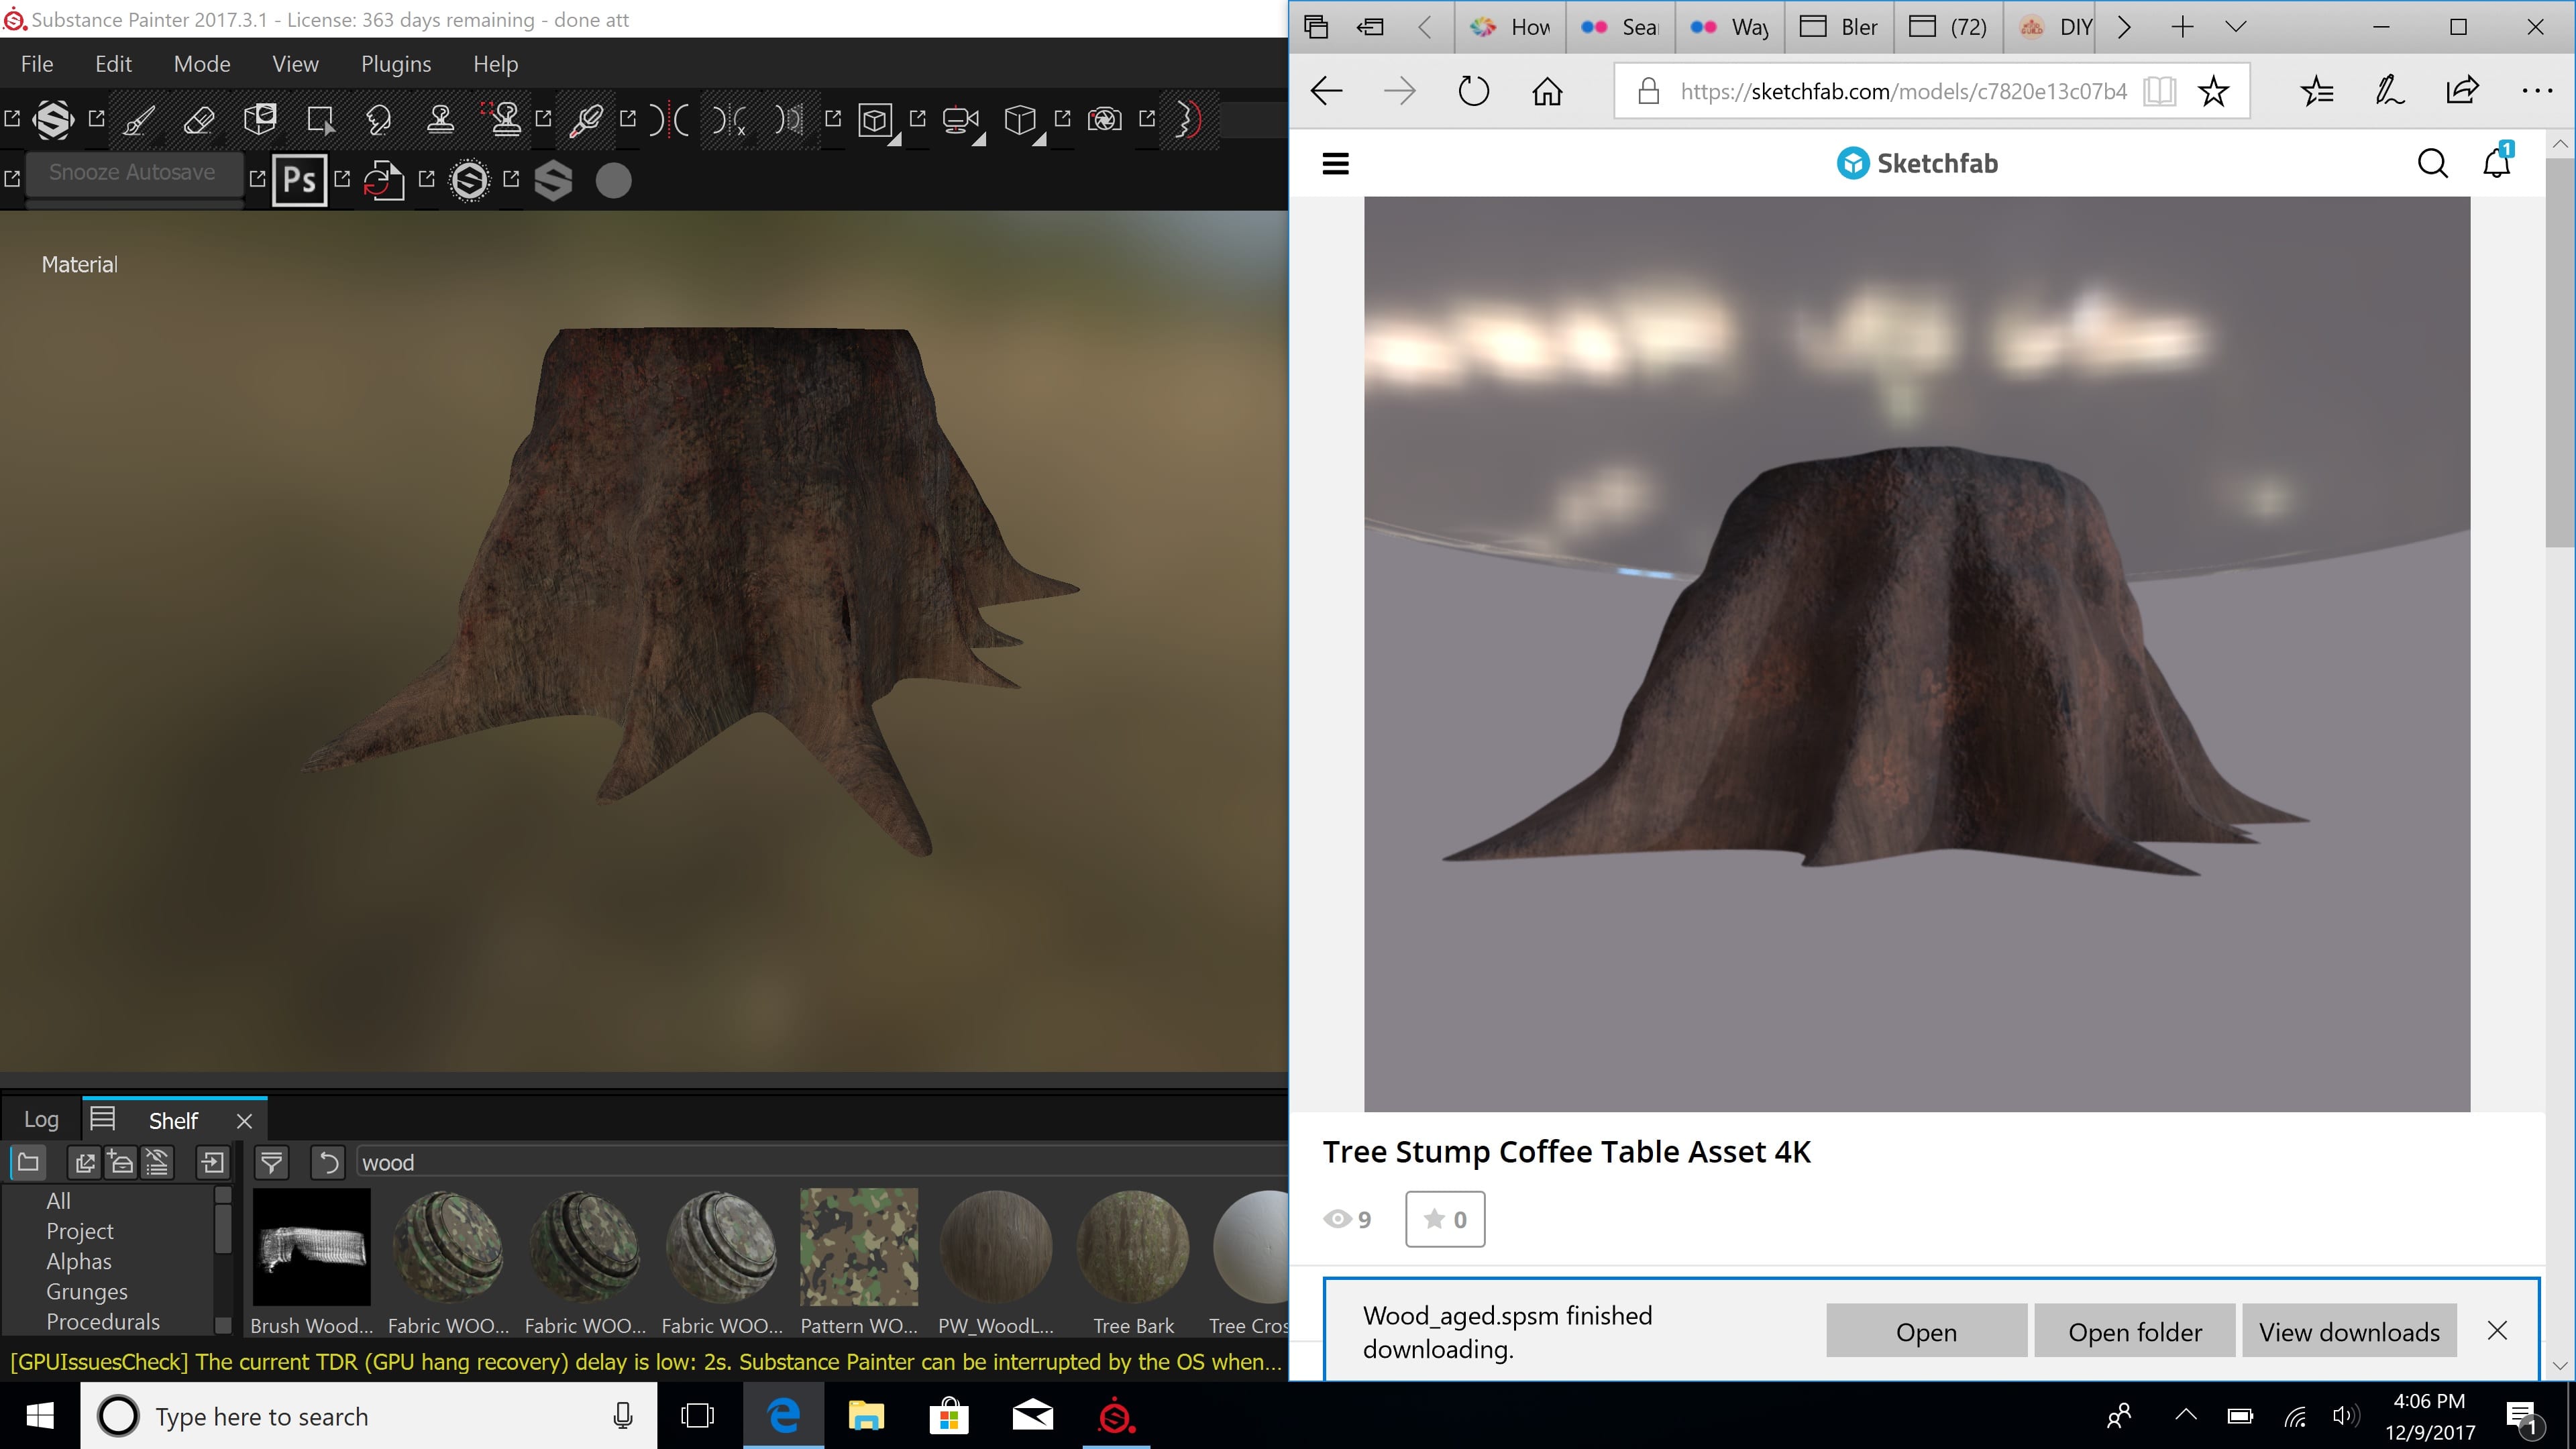
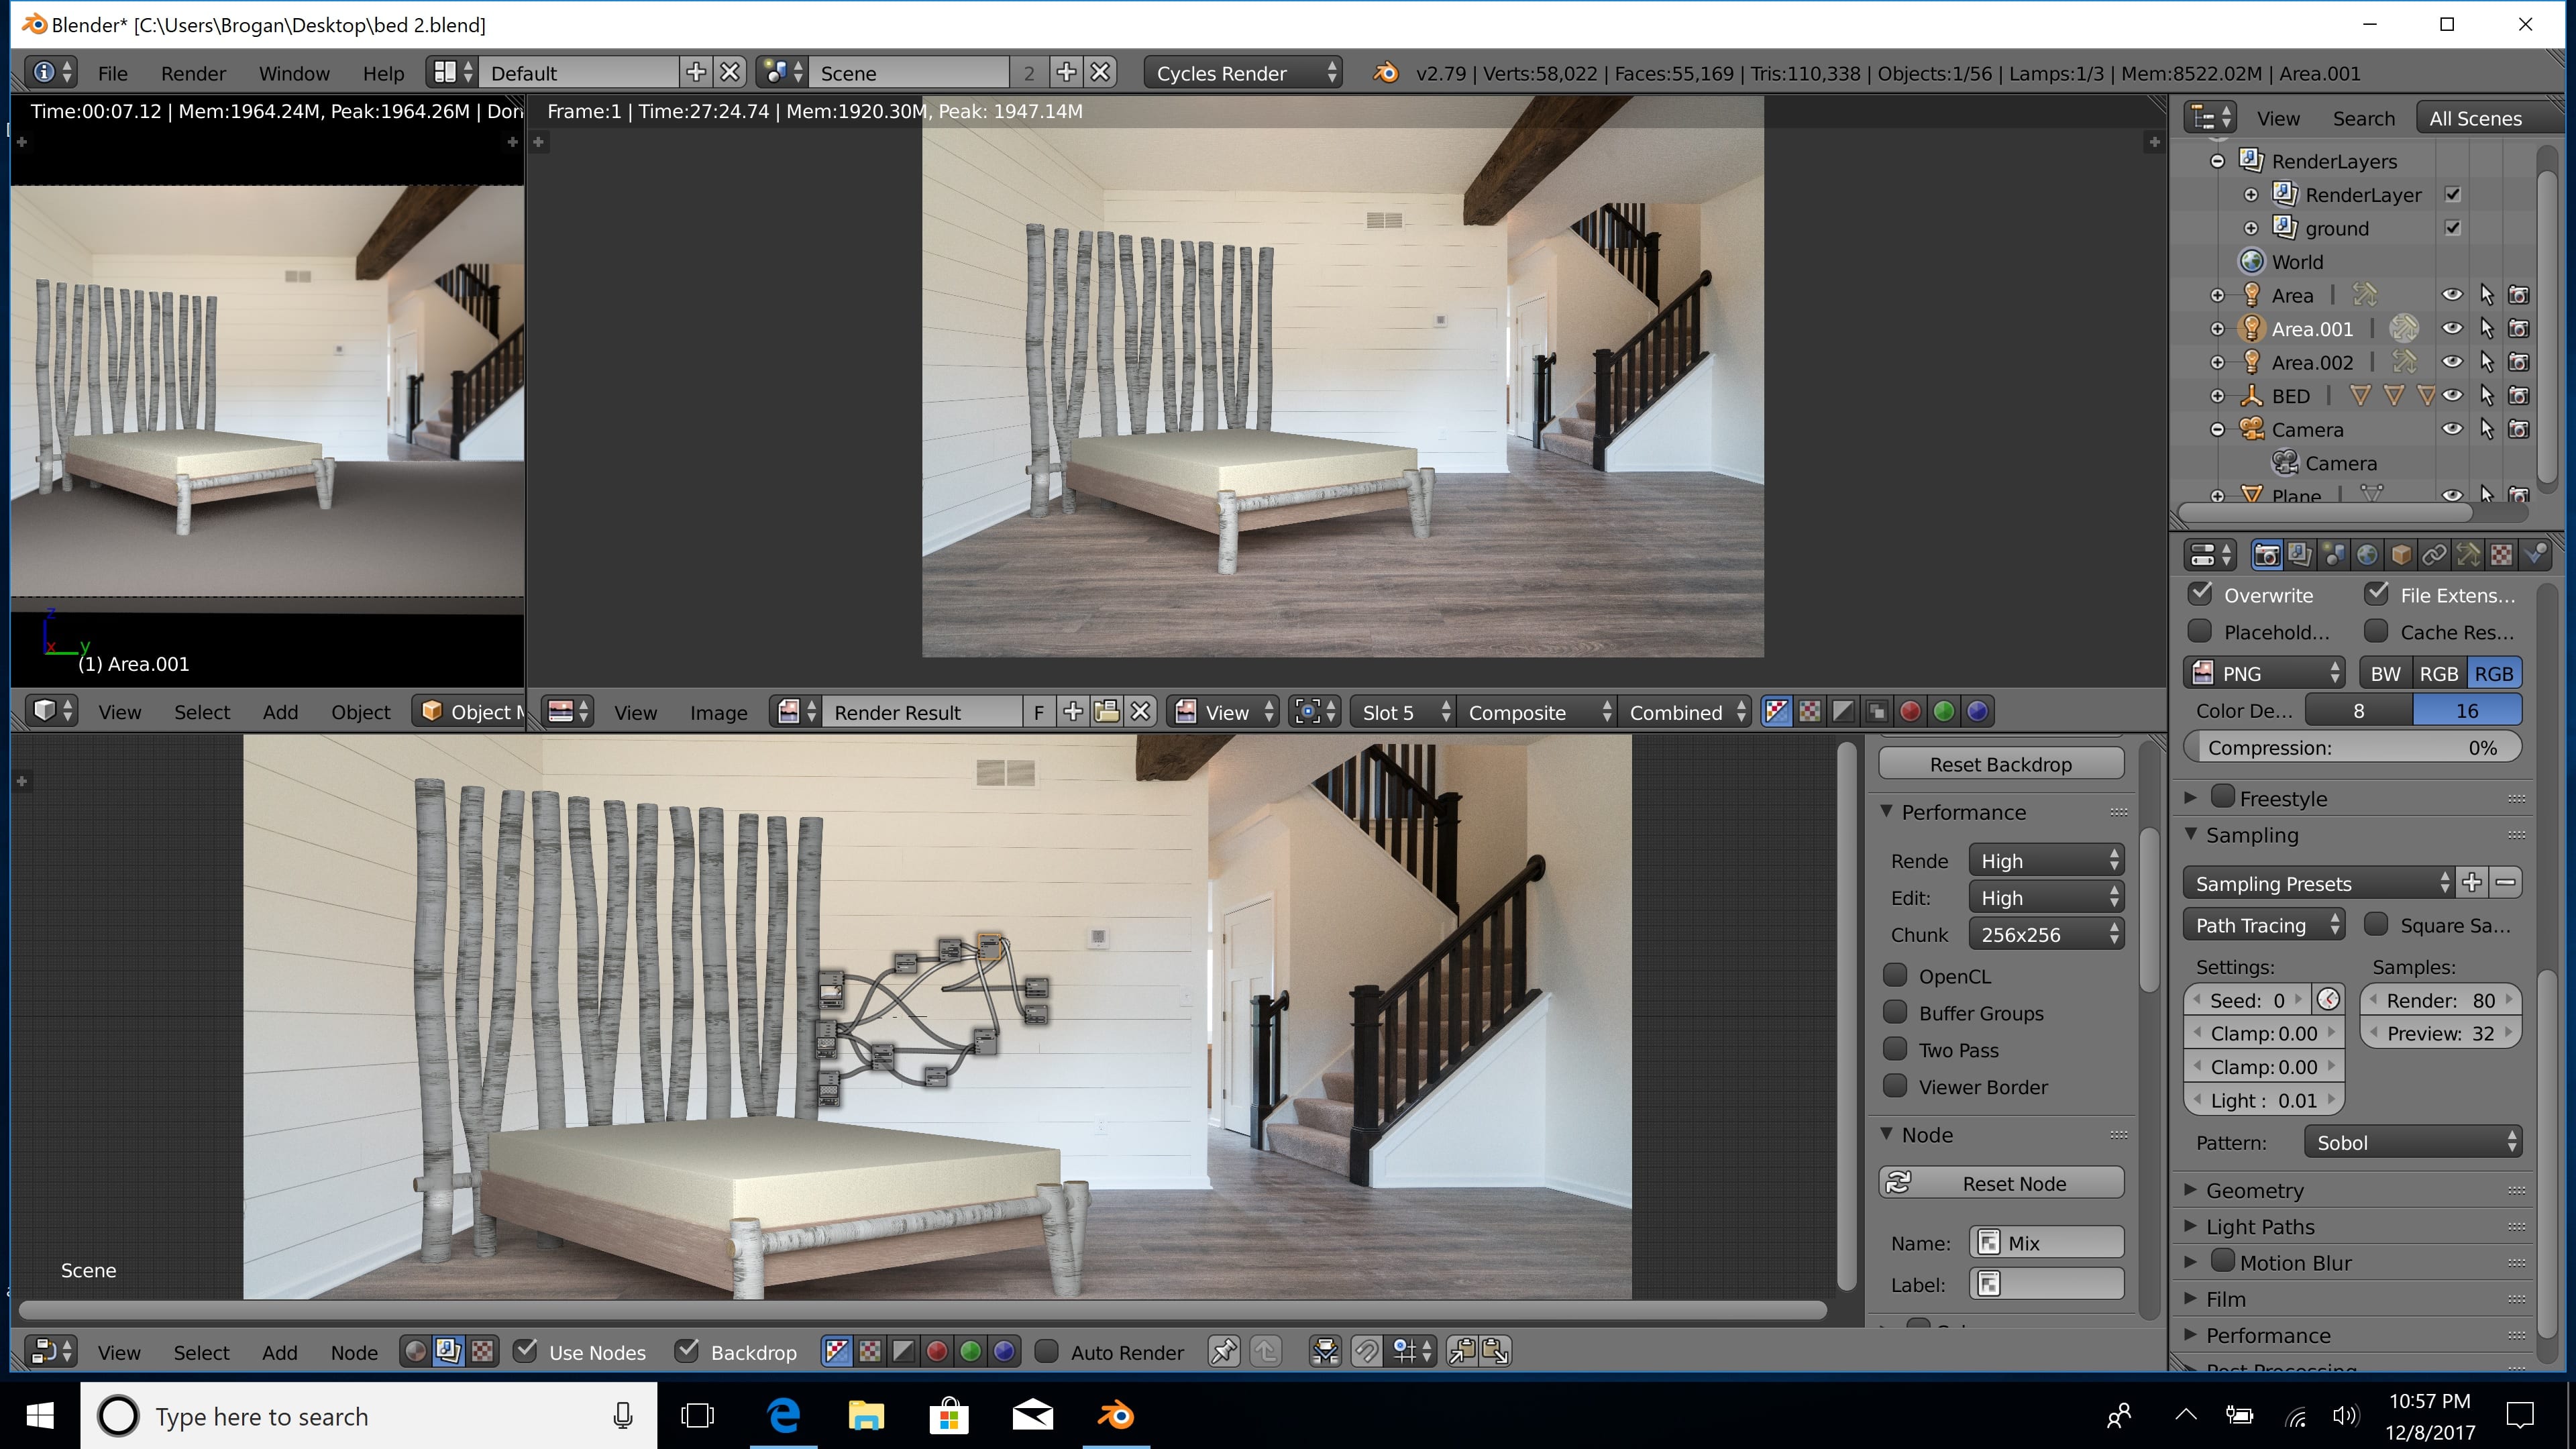
After seeking advice from the community, it was suggested that I tried adding a world texture to add more accurate reflection. I didn’t have an HDR image, but I managed to find a photo of the opposite side of the room. I also created a very rough panorama of the room from the 2 images I had, to see if I could make that work.

23679788328_7a38d91543_o

around room

I looked at a couple of helpful tutorials, but when I followed them, the results did not turn out as theirs did. They were able to see and rotate the world texture in object mode, and I was not. I tried to fix this, but found no answers online. I tried to then the photo of the other side of the wall alone instead of the ‘panoramic’ image, and although I could still not rotate it, it reflected the opposite side of the room well. I made the decision to use that, and stop searching for a solution because after a couple of hours, I still couldn’t figure it out, and I realised my time was better spent elsewhere on the project.

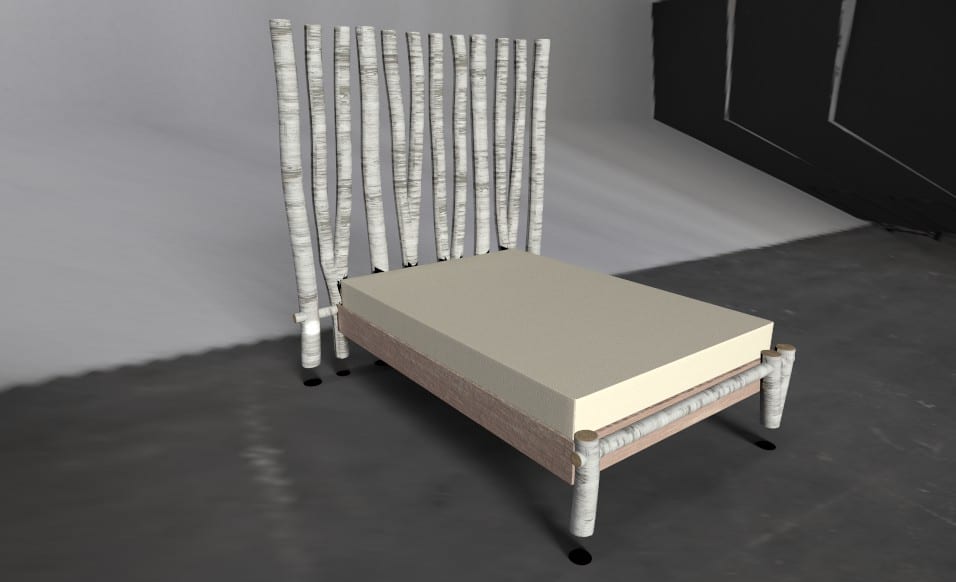
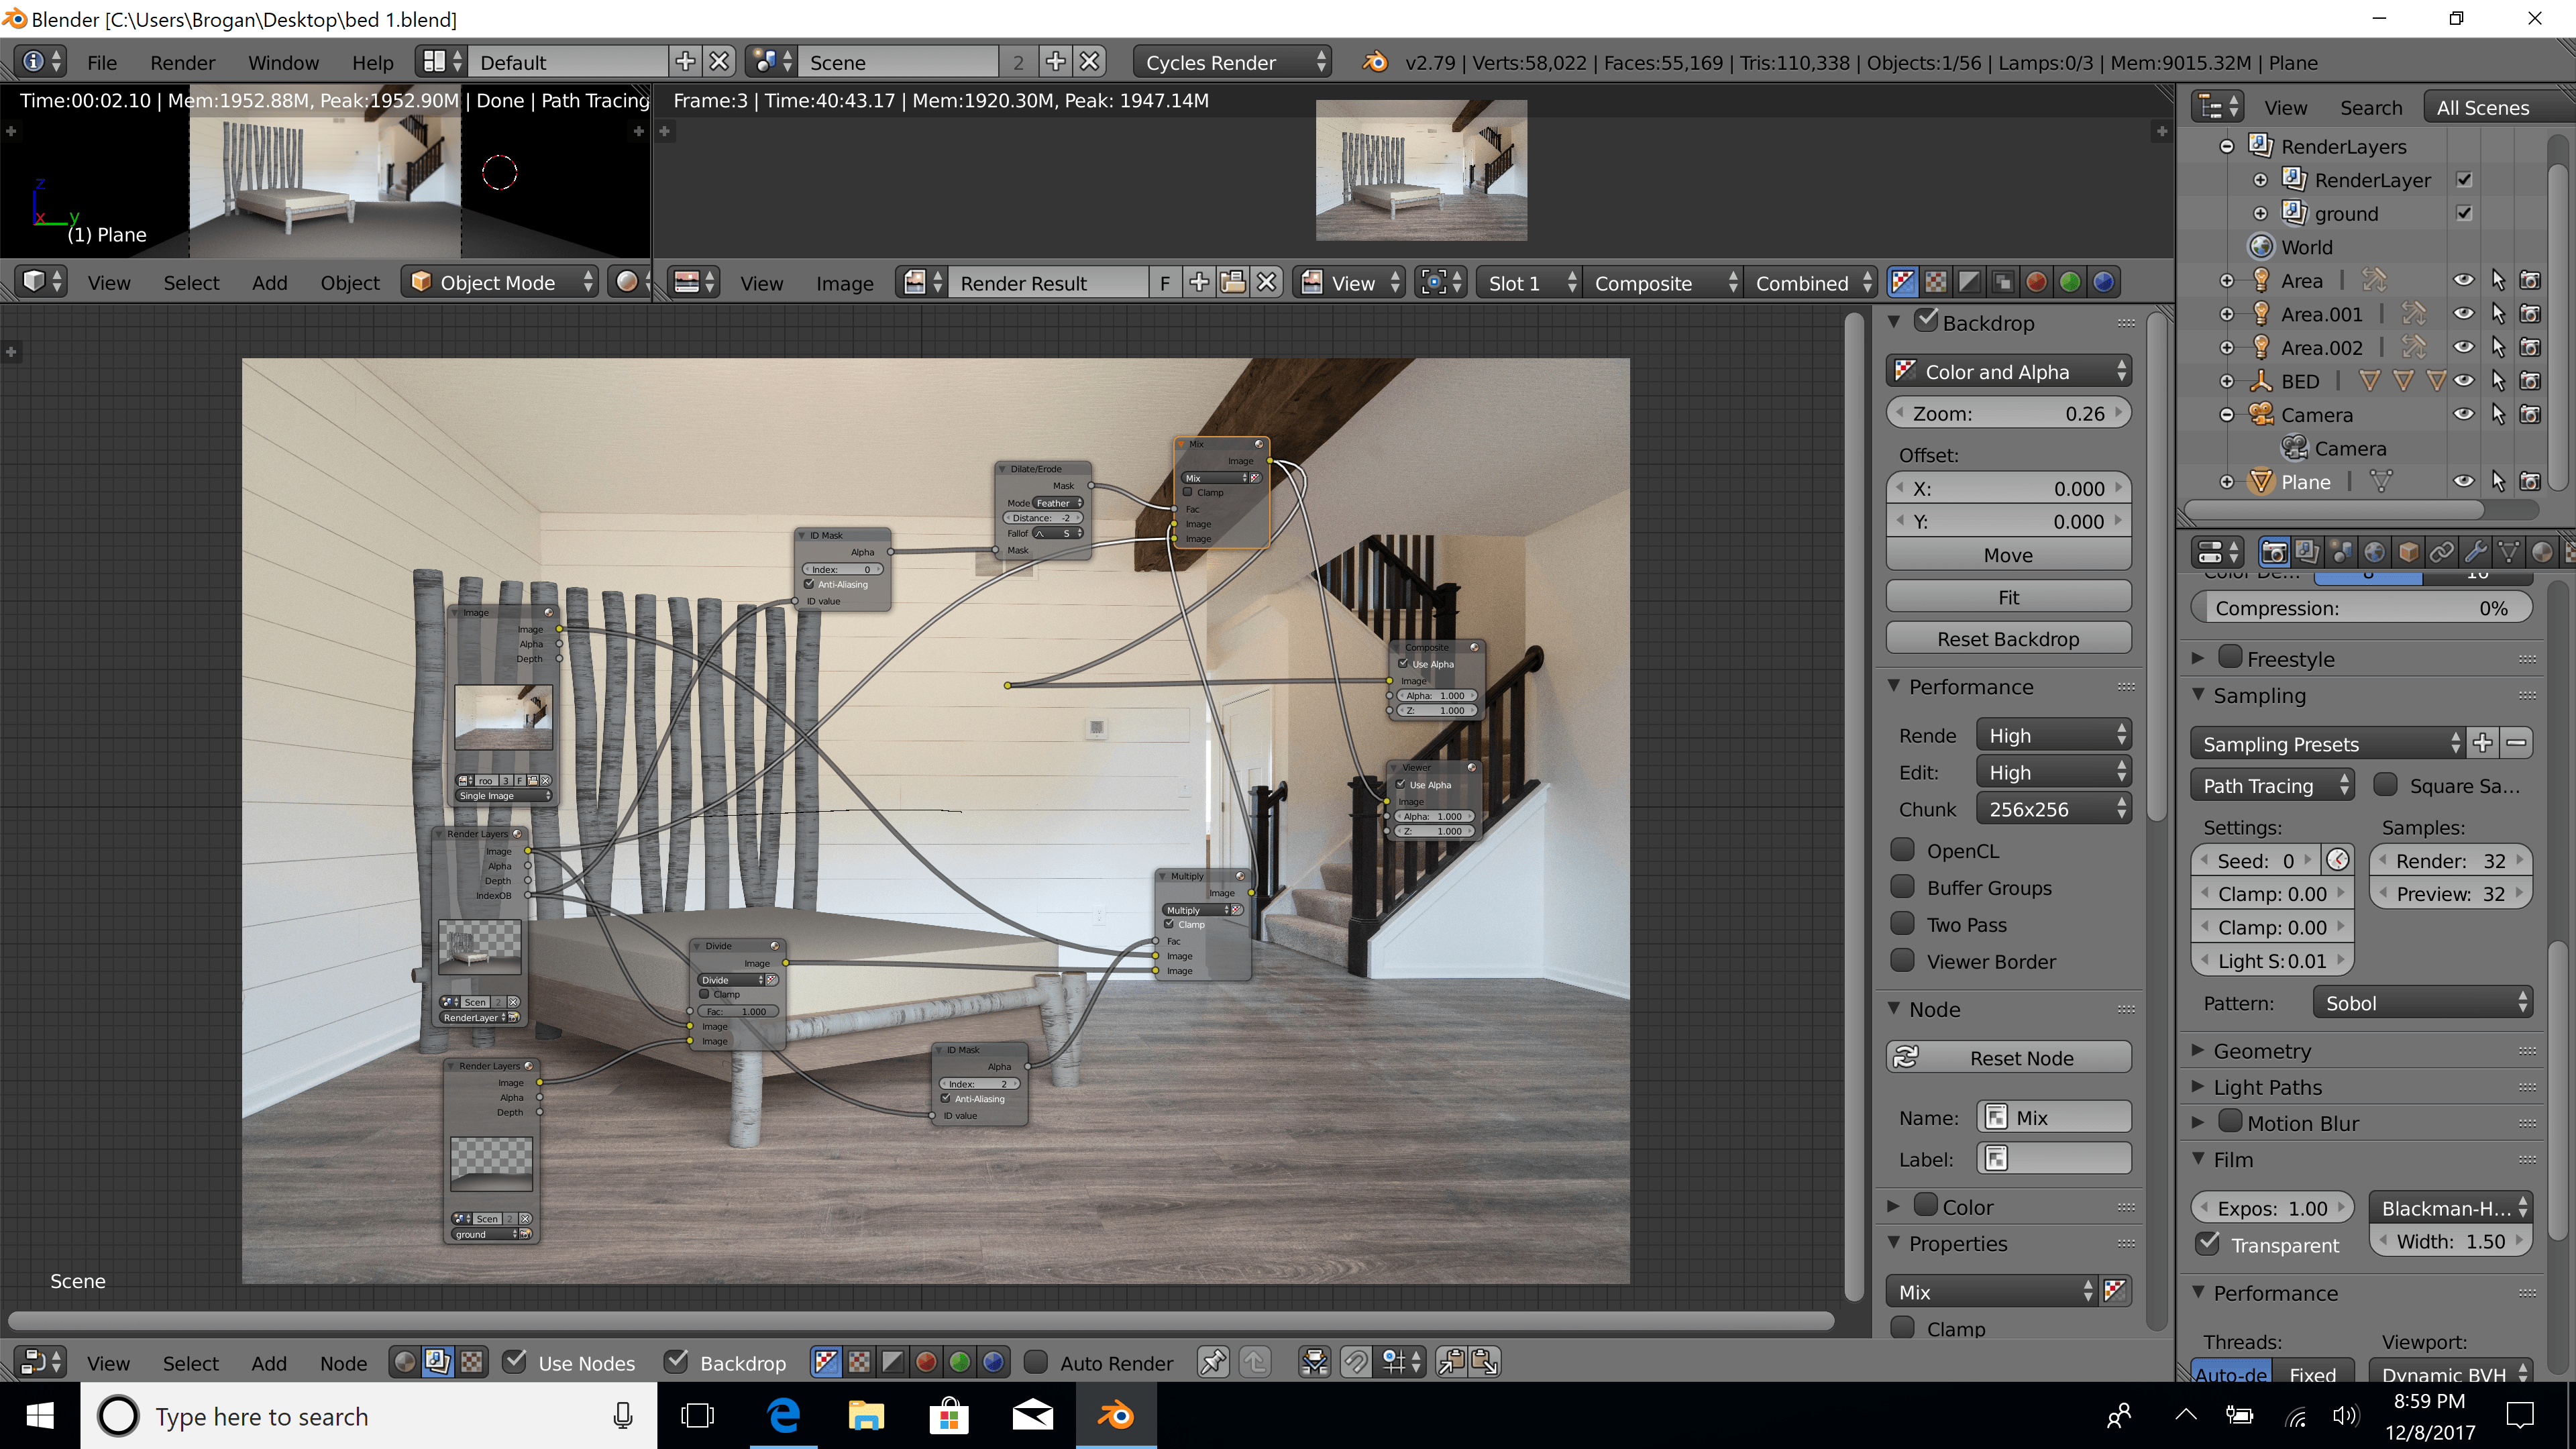
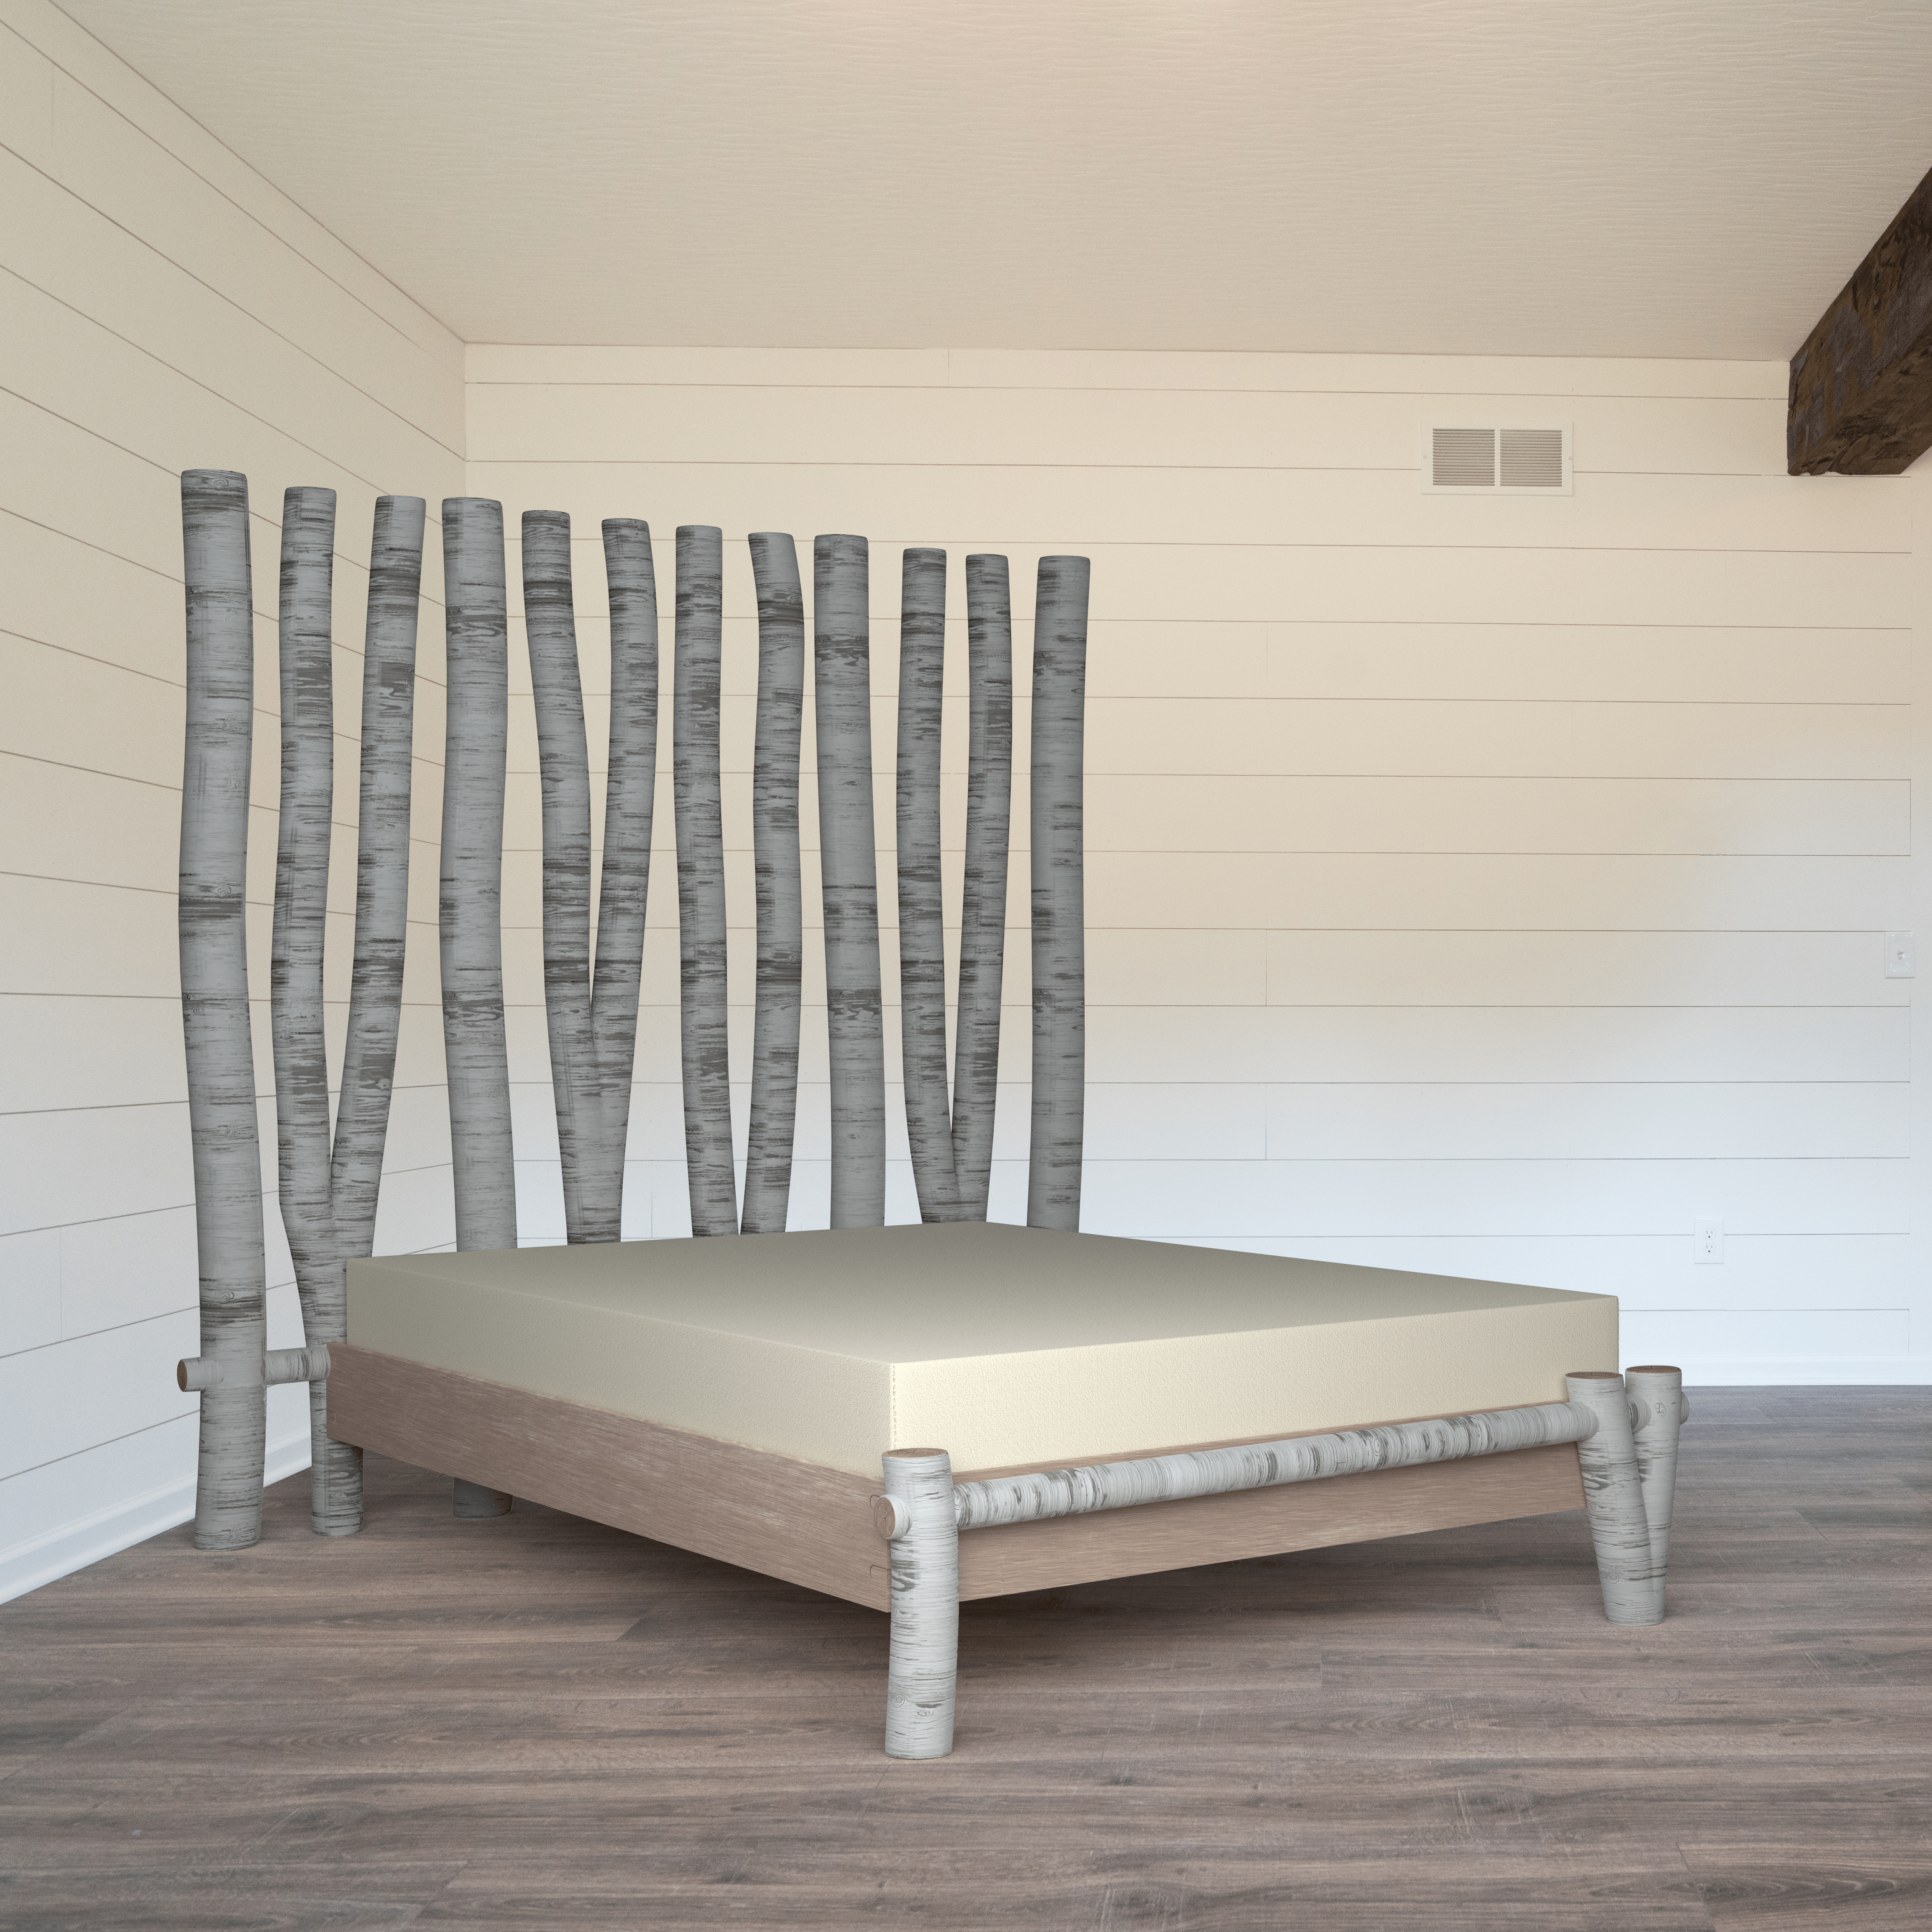
I rendered the new table out, and it is a huge improvement on the previous version. Asking for opinions and input certainly paid off.

5

table with world

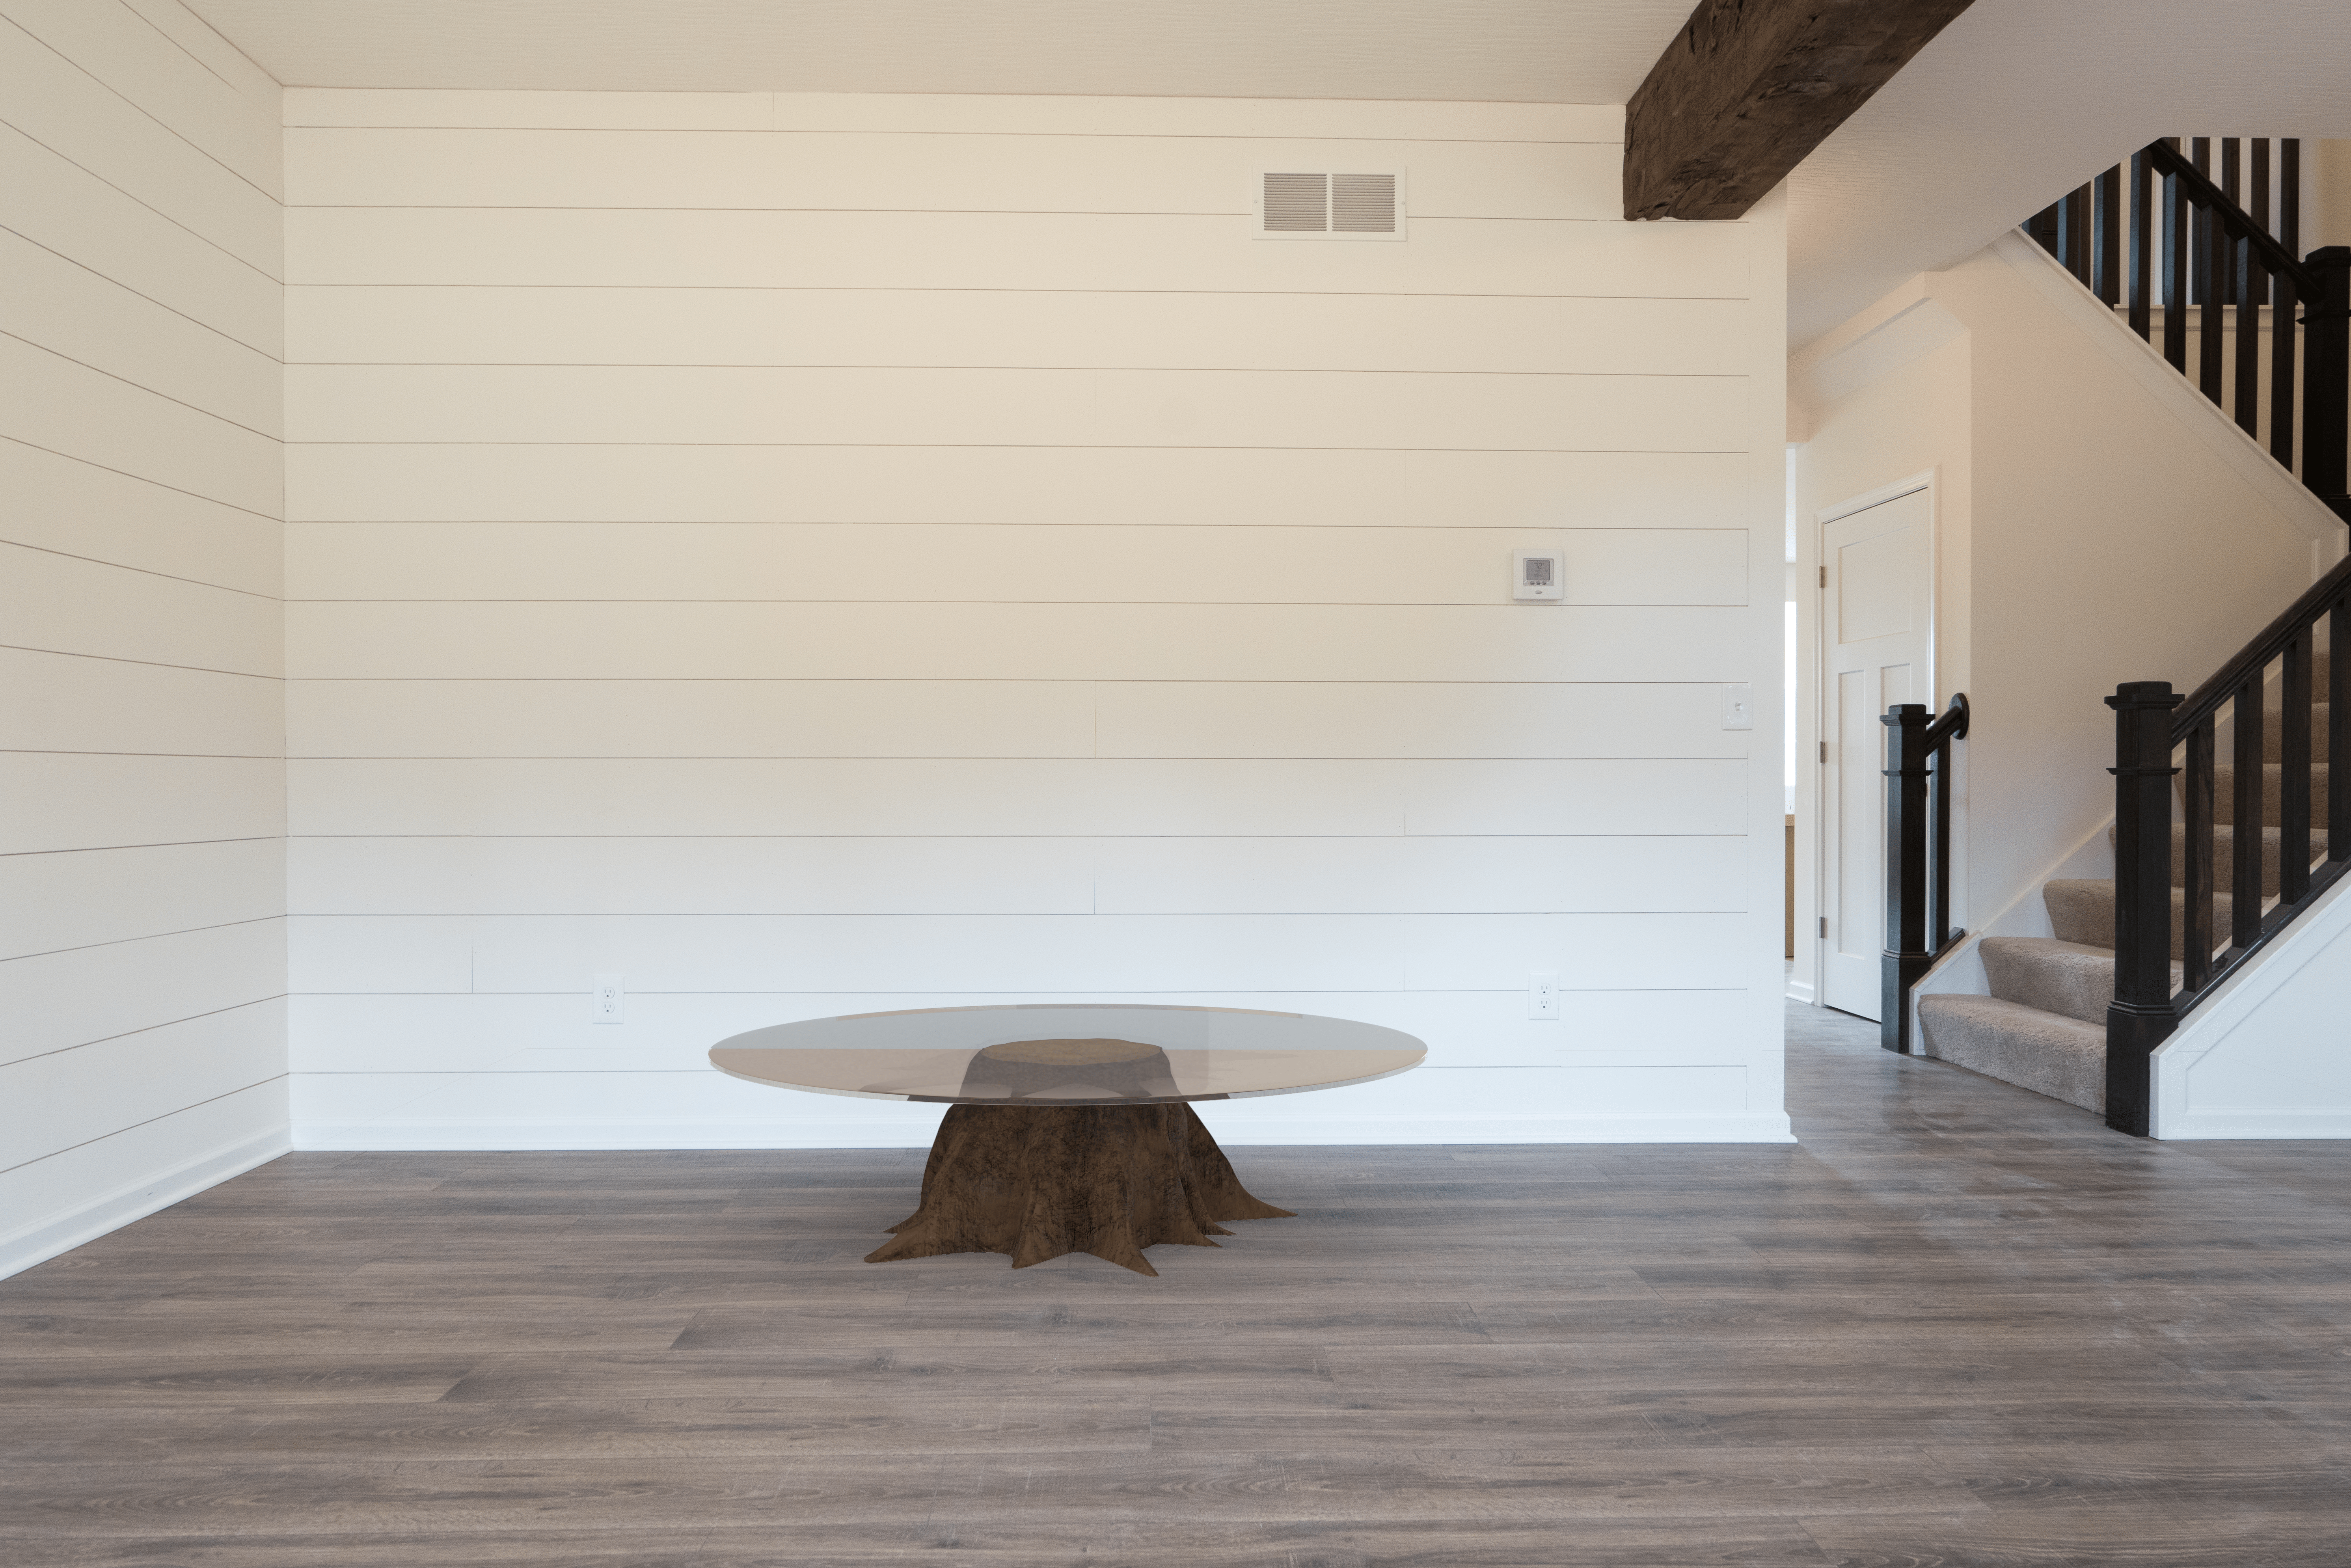
I edited the image in Photoshop to improve the composition.

table final


Coffee Table Ray Trace

So my next step was to add the coffee table to the scene in Blender. This time, I could use the scene and lighting already set-up, so this was much faster. I had to learn how to create a glass material inside Blender, and after experimenting myself, and my glass turning out a black colour, I realised I needed to research this.

table sm

I found a very useful tutorial from Easy Blender Tutorials which I followed to create a much more realistic glass.

table 2 sm

This had a lot of noise, so I experimented with different rendering, changing the sampling, and noise reduction. The Laptop I am using keeps crashing when I try to render using the GPU (which I later found out is down to my object being too high poly to render on the GPU), and there is little I can do to fix this, so I had to render using the CPU which took hours to get a noise-free render, but it worked eventually.

table 3 sm

The glass in this final render looks dark, but it is due to the reflection and refraction of the dark floor below. I’m unsure how to improve this, I will seek advice in the group on Facebook, and in the next workshop.

2nd Final Asset

So now that I have an understanding of all of the elements I need to incorporate into assets, and one asset I am happy with the result of (the bed), I need to start considering what my other two assets will be. My candlestick is a nice design, and I enjoy creating drift wood, but I feel as though it may be too simple as one of my 3 final assets. The bookshelf is something I really like, as it shows a different style, but this would need to be re-made from the base sculpture, as I have learned a lot from my mistakes since creating this first version. I also feel as though this would need some books or objects on the shelves as an addition. I really like the shape of my coffee table, and my UVs are good for this. I also really like the glass and ends of the stump, it is just the bark I don’t like. This is something I can improve now that I know more about layering textures.

Ray Trace Rendering

My next challenge was to add my bed to an image and render it out, to see how this would look in a high definition setting. Jon informed me that substance has a ray tracer built in, so I experimented with this, but struggled to get anything near the results I was hoping for. I tried various settings and setups, but had issues with scale of the model, as well as backgrounds. I tried re-exporting as .obj and .fbx files with various unit changes, but this didn’t fix the issue. Whenever I rendered, the results were very poor, even at UHD resolution, and 4K textures as seen below.

att 2 UHD


Jon then suggested I use Blender Cycles as it has a PBR  shader. I have never used Blender before, so it was a very steep learning curve. I started by finding an image on flickr to use, and found an image suitable for displaying my assets.

room

I then tried to follow a tutorial by Blender Guru, on how to add an image background to a sculpture in Blender, and Jon showed me how to add textures to the PBR shader in a workshop. I found this too fast to follow as someone who has never used Blender before, so I followed Jon’s tutorial series, which taught me a lot about how to use Blender, and I got used to the controls. I also learned a lot about using nodes as well as render passes, and my final image started to look a lot better as I tried different lighting.

2 3

I really like how my final image turned out.

bed medium

I then took this into Photoshop and edited it to make the image look less like it was downstairs, which I think improved the output.

Bed (3)

Bed Sculpture- The Result!

After fixing my normal intensity, and uploading in 2K, here is the result!

Birch Tree Bedframe
by focusf22
on Sketchfab

In this process, I have learned how to save time with many aspects through learning mistakes I need to avoid in the future, as well as learning to layer up textures to create my own.

My next step is to learn how to export this, and render a still using ray tracing, so that I can view this in 4K in a rendered setting, to check that all of the textures are correct, and to display the object for my final submission.

Bed sculpture- Texturing

After achieving the bark, I looked at other materials which fitted the style, and created the bed base, as well as adding rings to the ends of every pole. This was very time consuming, but worthwhile. I also added a cotton to the mattress as a bedsheet, and created my own stitching alpha to add stitches along all the corners.


I attempted to export the object at 2K to sketchfab, and this occurred…

Screenshot 2017-12-07 13.13.19

I could not figure this out, so I began to attempt to export all of my textures to my PC, then upload them as a .zip to Sketchfab. When I tried to upload, they expressed errors, in which I noticed the names of my materials did not match the names of the UVs on the .obj file. I tried to re-name the lamberts in substance back to the original names of the .obj, which was unsuccessful at first, but once I had attempted this again with the correct names for the correct files, it worked as a normal sketchfab export.

Screenshot 2017-12-07 13.14.49


I uploaded to sketchfab at 4K, which takes a long time to load and is very slow. It did make me realise that my normal detail is too strong on the trunks though, as can be seen here.

Bed Sculpture- The Silver Birch.

Now that all the sculpting and maps have been finished, I was able to move onto creating my birch bark…. This brought with it many challenges.

Screenshot 2017-12-07 15.34.50

I searched and searched online for a silver birch texture but found nothing available to me. Very few people had created it, and none of those shared it. I has a substance from substance share for a trunk, which had great reviews, plus horizontal ridges which fit the Birch bark perfectly. I decided to use this as the base to my bark.

41

I adjusted the substance with many tweaks to reach this point, but it still doesn’t look anything like silver birch bark. It is important to remember that in home décor, birch branches are often treated to make them appear more white, grey, or silver as these colours are often preferred.

I then added more lines through normal detail, with an alpha brush to add inverted ‘scratches’. This gave the bark much more depth.

42

I left the bark at this point, as I was running out of ideas of how to make this more Birch-like, and the trunks as they were looked okay. This was not the desired effect though.

A little later, I had an idea after remembering a substance I had seen on substance share- ‘wood painted’. I applied this over the top, and adjusted many levels to create a much more birch-like material.

43

After a few more corrections to various materials, I decided I was happy with this birch material, and I’m very pleased I didn’t just give up when I couldn’t find a way to create what I had envisaged.

Bed Sculpture- Colour ID Experiment

After applying my UVs, I experimented with a different way to create my colour ID maps.

When creating the colour ID for the stump, I realised that there were issues with the edges, which I then fixed in Photoshop. This took a large amount of time, and still had issues so I tried simply painting in blocks, which proved to be successful.

Colour ID 6 Colour ID exp

When creating my UVs for the bed, I also considered the layout, by adding slight gaps or ‘buffers’ to aid the painting of the Colour ID map afterwards.

I coloured the entire object blue, and created a colour ID map for each UV map. I then took the ID maps straight into Photoshop, and simply coloured over the shapes with various colours to apply different IDs.

Mattress Mattress ID2

Bed base ID Bed base ID3

Bed head ID Bed head ID5

This worked really well, and saved me a lot of time. It meant that I didn’t have to add different coloured materials in Maya, and that I didn’t have any bleeding issues to fix in Photoshop either. This was an idea I had myself, and wanted to see if it worked out well, which it did! I will create all my colour ID maps like this from now on, as it saves time as well as making the end result cleaner.


Bed Sculpture- UVs

Next for the bed was smoothing, but as I learned from the stump, breaking the model up into sets before smoothing worked best. I broke everything up, before smoothing, then UVing my model. I remembered what I had learned about wood grain, and made sure I applied this to my UV layout. I split my model into 3 UV sets. The base of the bed and foot, the headboard, and the mattress. The reason I UVed the mattress separately, was so that if I choose to add bedding or pillows in the future, I can add those to the mattress UV map.

23 24 25

The whole process took many hours, but it was still a lot quicker and more efficient than previous attempts. I knew where to cut to unfold objects without visible seams, and so that they laid out without distortion.

Bed Sculpture- Proportions!

So the next sculpture I started working on was the silver birch bedframe, which was one of the more labour-intensive assets. I had my sketches, but realised that I needed the proportions to be correct, so I made a template in Photoshop so that I could line my sculpture up on every axis.

IMG_20171030_230914 bed proportions

I created the sculpture, which went well, but I realised that when I created the ‘Y’ shaped trunks by combining them, which meant that the meshes interlinked and caused issues. I had the same problem with the stump, and I fixed this by deleting interlinking meshes, and adding faces between the 2 halves, which was very time consuming. This time, I fixed it by applying union instead of combine, which didn’t work at first, but after some research on techniques, and history deletion, I made this work smoothly. My mistakes took extra time, but I have now learned how to create correctly in the first place, which will make my process much quicker in the process.

22